Managing Volumes
We mentioned volumes throughout this documentation already. This page focuses on volumes, how they are created, and how to use them to extend a instances storage.
Creating Volumes
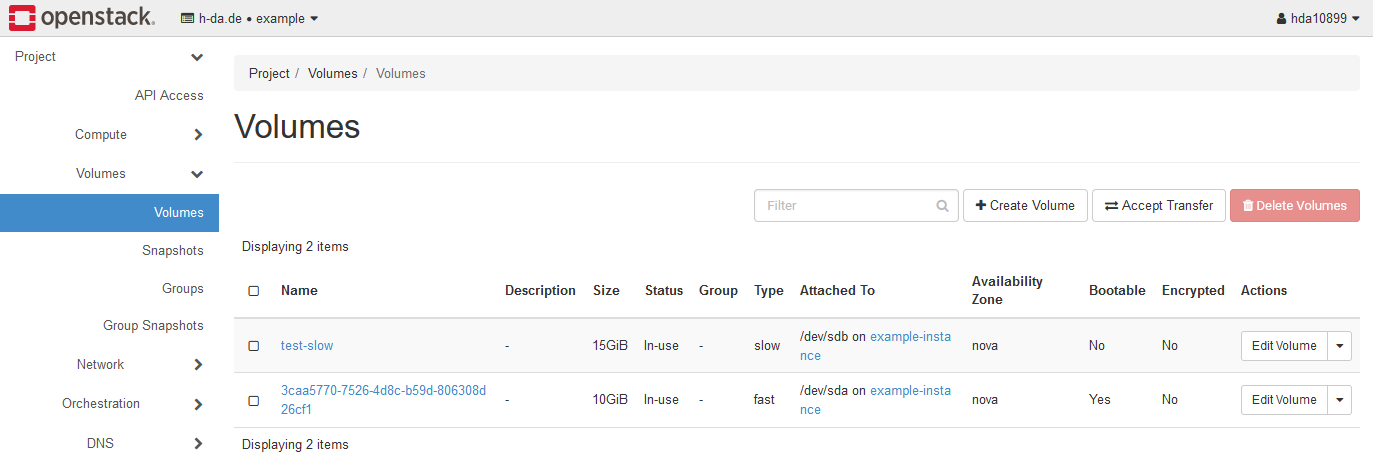
Navigate to the volumes page found under the Volumes category on the left to create volumes. This
page also displays the boot volumes of your instances.
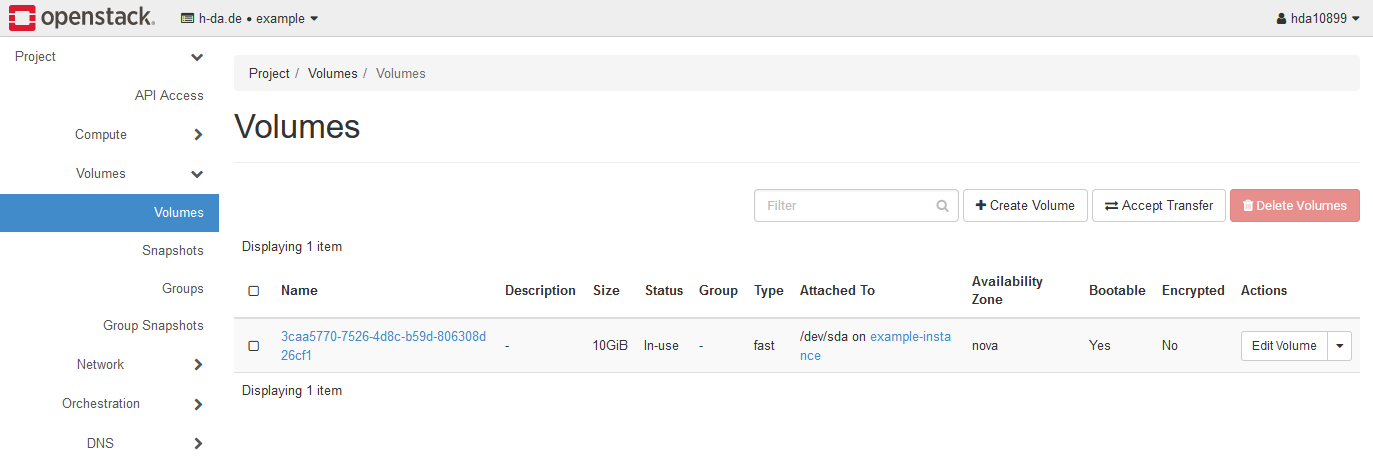
Create a new volume by clicking the +Create Volume button. Enter the required information in
the dialog. Use the slow storage type (class) for reasons discussed here and down below.

Implicitly created volumes
Launching an instance implicitly creates a volume using the fast storage class and attaches this
volume to the /dev/sda device of your instance. As discussed here this might
limit your ability to create further volumes using the fast storage class as the used class cannot
be changed for boot volumes.
Attaching volumes
After creating the volume, select Manage Attachments from the dropdown on the right to attach it
to your desired instance.
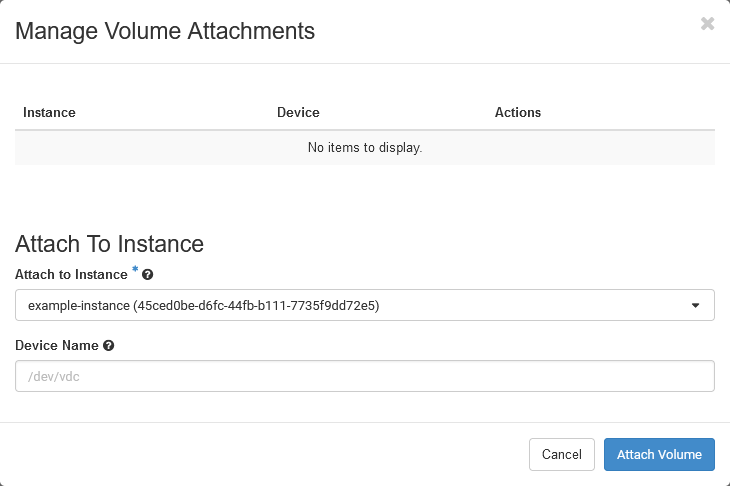
Select your instance in the attachment dialog. The device is selected automatically. If you need the volume attached to a specific device you may specify it here.
Configuration inside the instance
Use your volume by logging in to your instance and verify that the device is available using i.e.
lsblk. In addition to your boot volume on sda you should also see your newly attached
volume (here sdb).
$ lsblk
NAME   MAJ:MIN RM SIZE RO TYPE MOUNTPOINTS
sda      8:0    0  10G  0 disk
└─sda1   8:1    0  10G  0 part /
sdb      8:16   0  15G  0 disk #(1)
- Here we see our newly attached volume
Create a file system on the volume and mount it. Use a volume label to better identify your volume.
Using the same name you used when creating the volume in OpenStack, such as test-slow in the example below,
makes tracking easier when volumes are not mounted. Choose any supported filesystem by your OS, like ext4 on Linux.
$ mkfs -t ext4 -L test-slow /dev/sdb
$ mount -L test-slow /mnt #(1)
- Choose any mount point of your liking.
/mntis used as an example here.
Tip
Set the sticky bit on /mnt to allow access for non-root users when the volume is mounted.
Mount the volume on instance restarts by adding an entry to /etc/fstab. Use
the volume label created earlier to ensure the correct volume is mounted.
Extending Volumes
Volumes, regardless if they were created manually or implicitly by creating an instance, can also be extended.
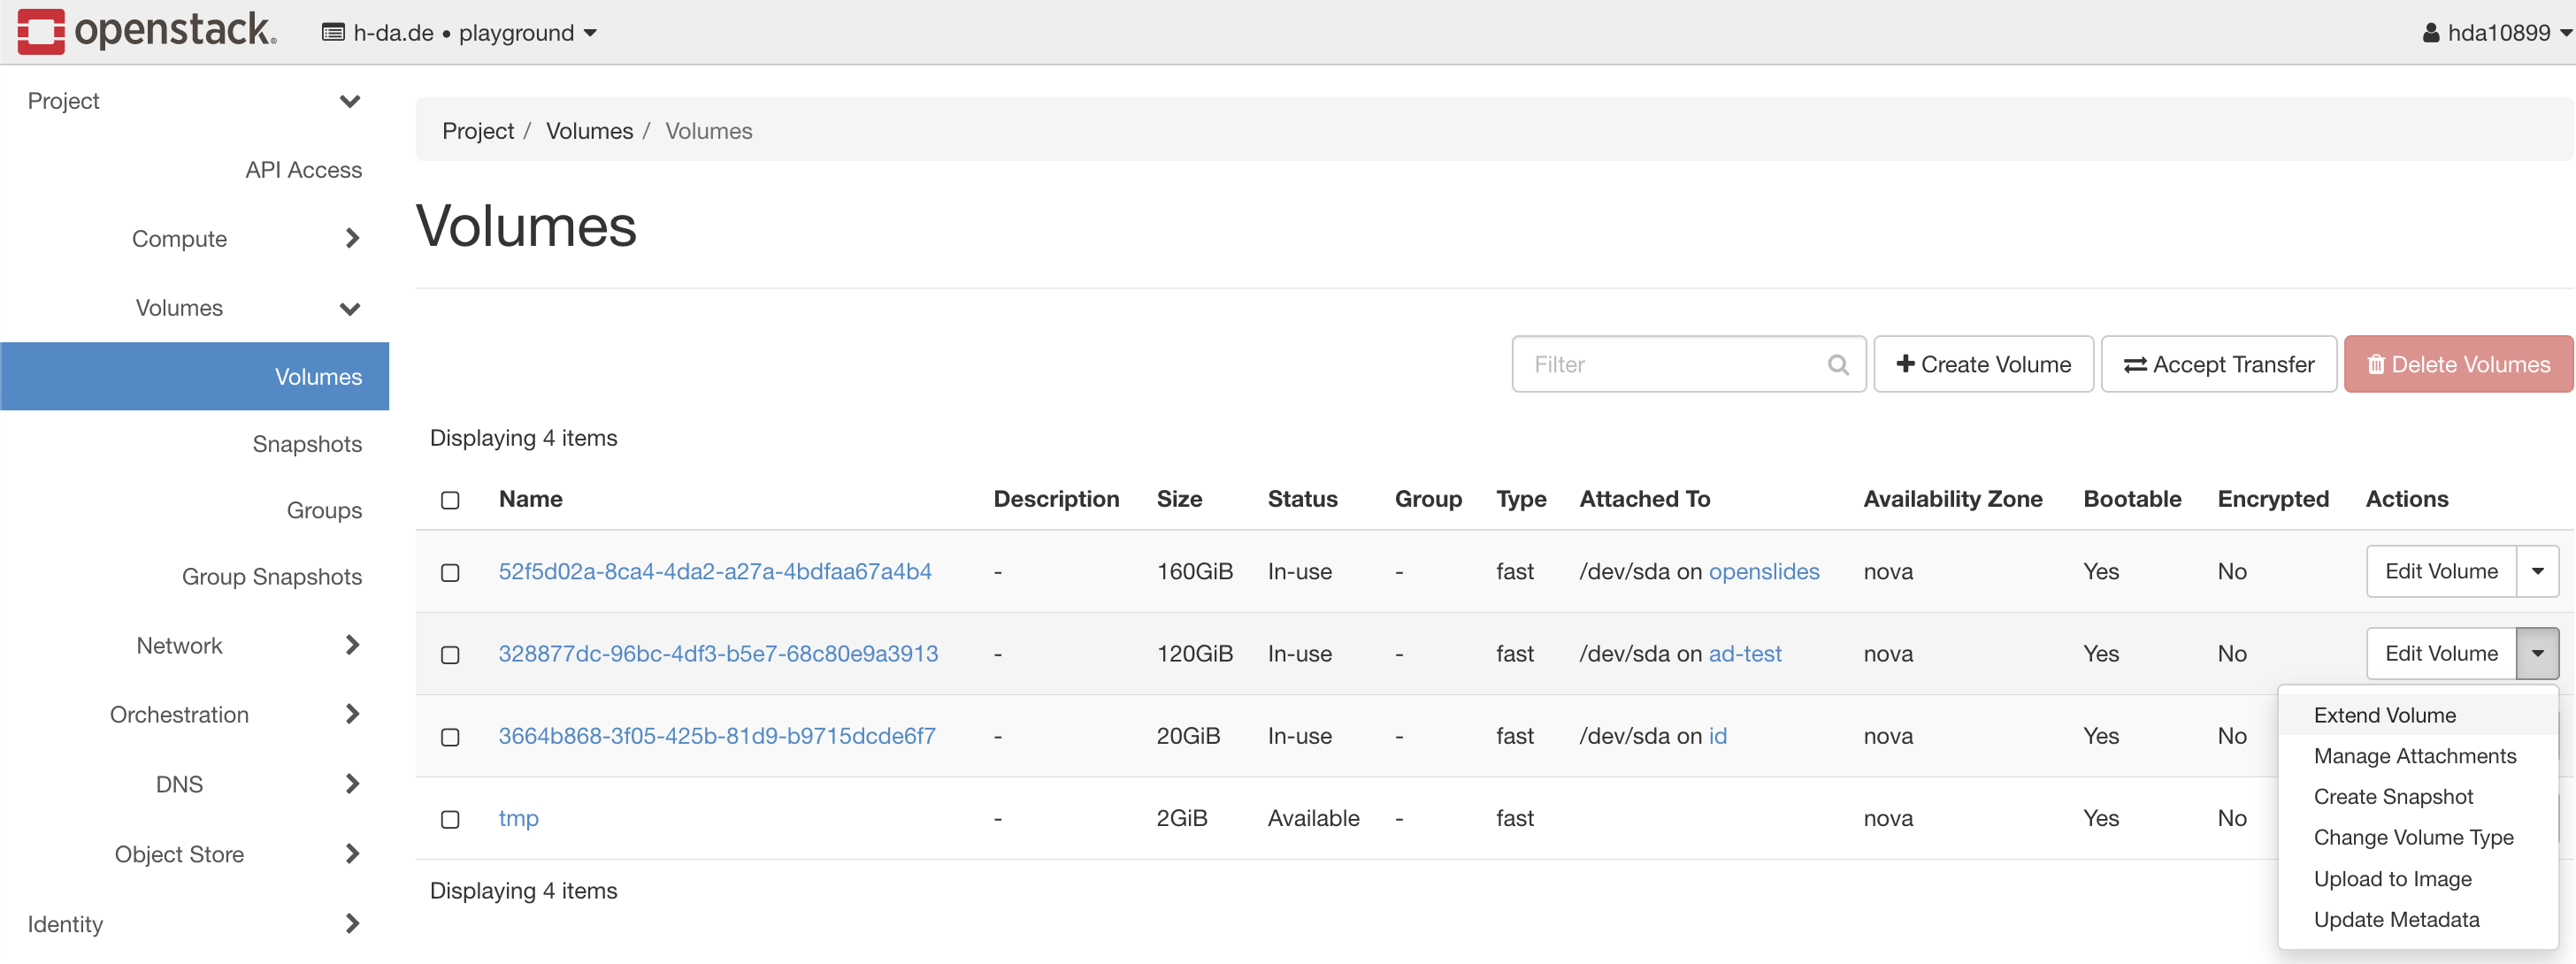
To extend a volume navigate to the volumes page in the dashboard and select Extend Volume from the dropdown.
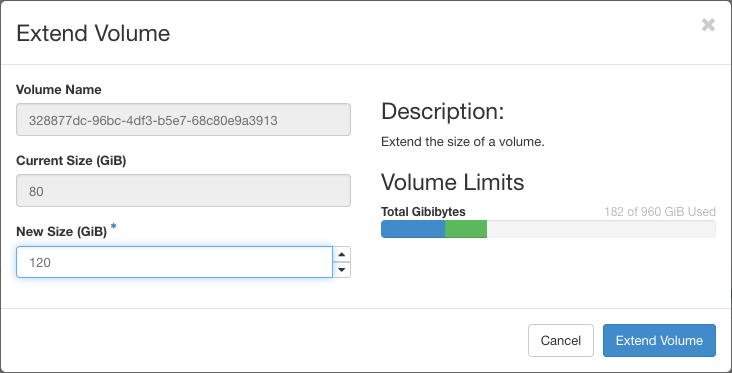
From here you can enter the new volume size. Please note that the volume size cannot be reduced, it can
only be increased.
After entering the new volume size in the dialog click the Extend Volume button.
Finishing Tasks
After the volume has been resized some steps need to be performed within the operating system itself to make use of the newly available space.
Note
Steps below were performed on an CentOS instance. The commands may differ depending on your Linux distribution.
Running lsblk will show you that the actual disk is now bigger than the partition of your system. Follow
the steps below to increase the size of the partition to match the disk size.
$ lsblk
NAME   MAJ:MIN RM SIZE RO TYPE MOUNTPOINTS
sda      8:0    0  20G  0 disk              # <--- Disk size
└─sda1   8:1    0  10G  0 part /            # <--- Partition Size
To grow the partition run growpart /dev/<device_name> <part_no> with device_name being sda and
part_no being 1 in this case.
$ sudo growpart /dev/sda 1
CHANGED: partition=1 start=2048 old: size=20969439 end=20971486 new: size=41940959 end=41943006
Lastly, resize the file system with xfs_growfs and confirm that the partition size changed correctly
with lsblk.
$ sudo xfs_growfs / #(1)!
meta-data=/dev/sda1             isize=512    agcount=6, agsize=512000 blks
         =                      sectsz=512   attr=2, projid32bit=1
         =                      crc=1        finobt=1, sparse=1, rmapbt=0
         =                      reflink=1    bigtime=0 inobtcount=0 nrext64=0
data     =                      bsize=4096   blocks=2621179, imaxpct=25
         =                      sunit=0      swidth=0 blks
naming   =version 2             bsize=4096   ascii-ci=0, ftype=1
log      =internal log          bsize=4096   blocks=16384, version=2
         =                      sectsz=512   sunit=0 blks, lazy-count=1
realtime =none                  extsz=4096   blocks=0, rtextents=0
data blocks changed from 2621179 to 5242619
- The
/here isimportant!
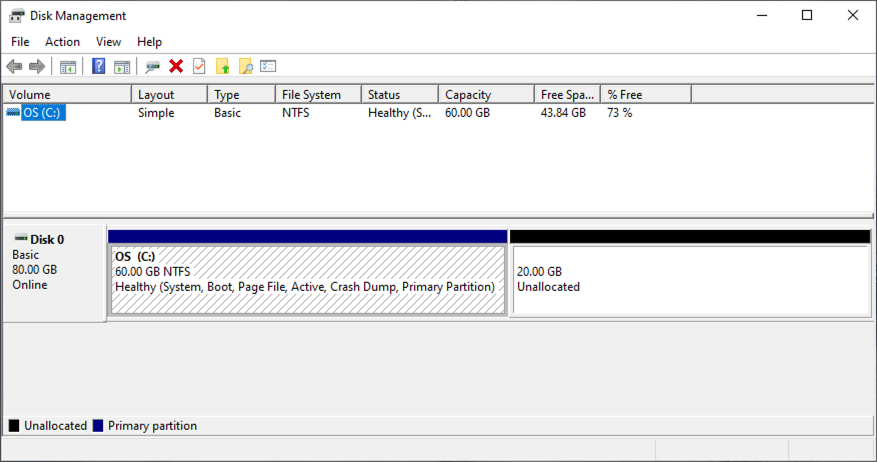
To make use of the extended volume space in Windows you need to open up the Disk Management utility either by right-clicking the Windows icon in the taskbar and selecting the utility, pressing Win+X and selecting the utility or using Windows' search.
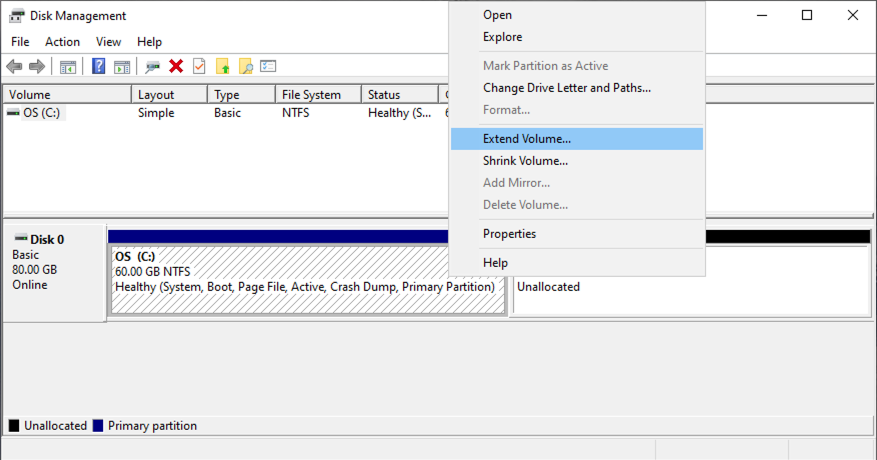
Here you need right-click the already present partition. NOT the unallocated space
In the menu then select Extend Volume...
Click through the Extend Volume Wizard and confirm your settings
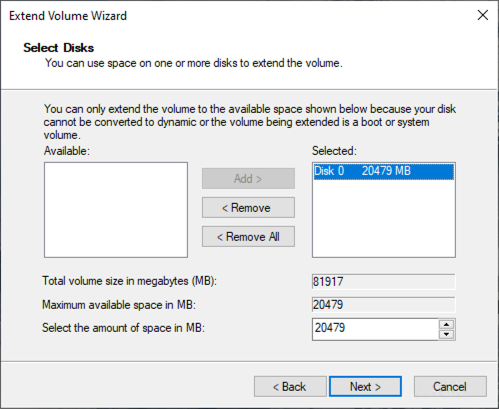
Afterwards yo are able to use the increased volume space.
Removing volumes
Reverse the steps above to remove a volume again. Perform the following steps in this order:
- Unmount the volume if it is mounted in an instance
- Delete the
/etc/fstabentry if one exists to prevent boot failures - Detach the volume from the instance
- Delete the volume
Log into your instance and unmount the volume.
Open the /etc/fstab file with an available editor like vi and remove the entry that represents
the volume. Save the changes after removing the entry and close the editor.
Perform the next steps either using the CLI or the dashboard. The steps using the dashboard are shown
here. Navigate to the volumes page found under the Volumes category on the left.
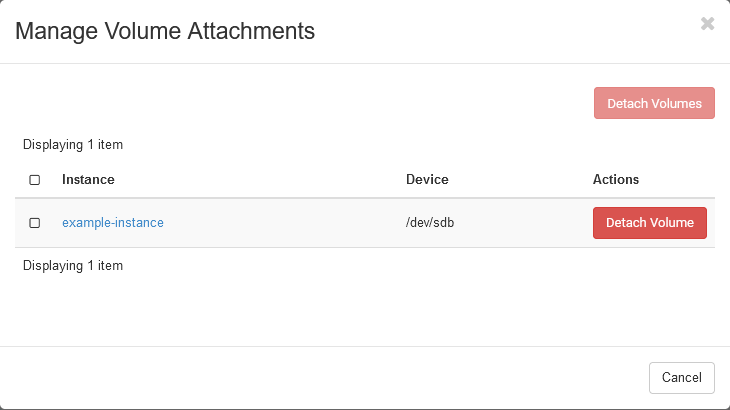
Detach the volume by selecting Manage Attachments from the dropdown on the right. Select the desired
volume in the dialog.
Lastly, delete the volume from the list to free up your volume quota again.