Networking
This page goes over the networking resources of your OpenStack project. By default we create a project network with two subnets, one for IPv4 and the other one for IPv6, alongside a router connecting the networks to the public network.
Networks
To view your networks or create additional ones navigate to the Overview page which is located under
the Network category on the left.

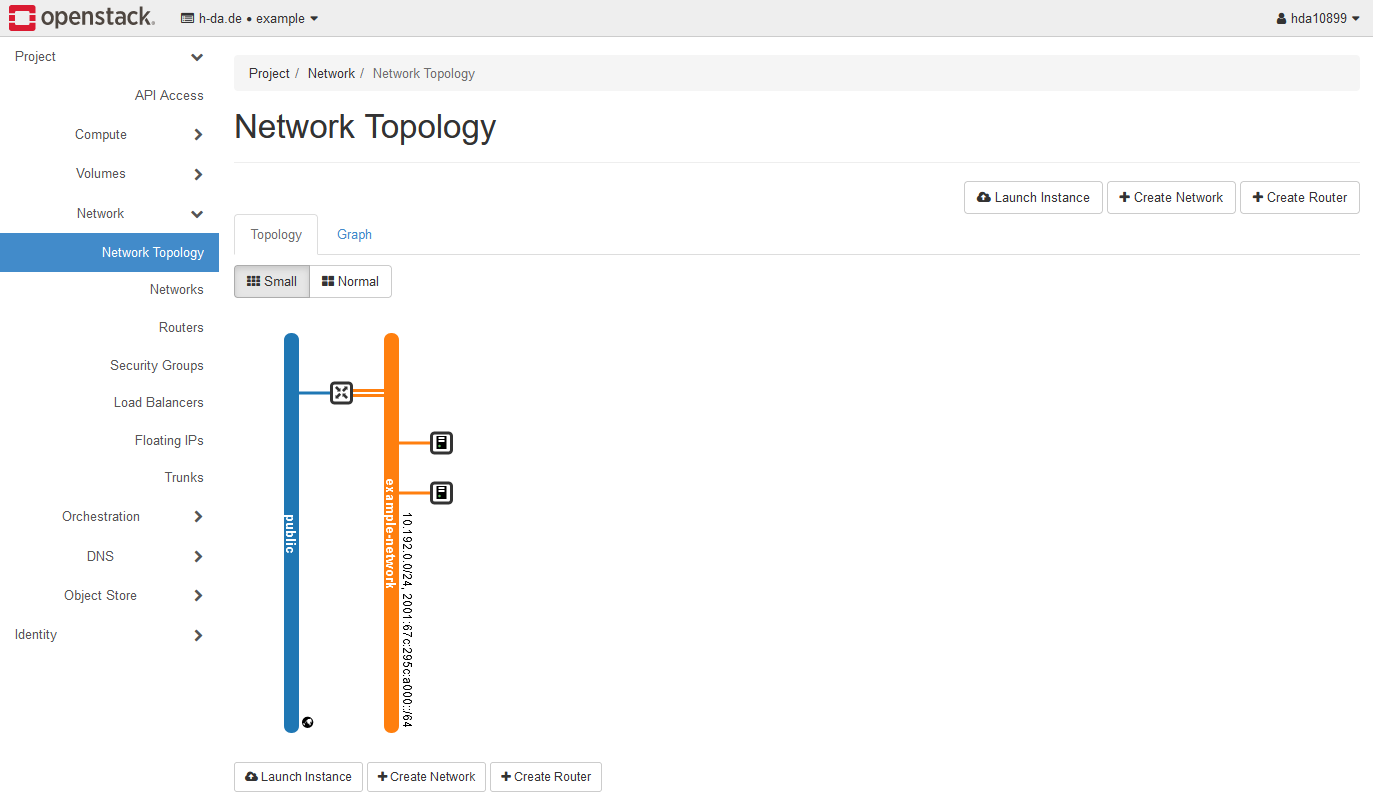
Info: Network Topology
Here you will also find a Network Topology section which provides a visual representation of your infrastructure. You will also be able to create new networks, launch instances or create new routers if necessary using this view.
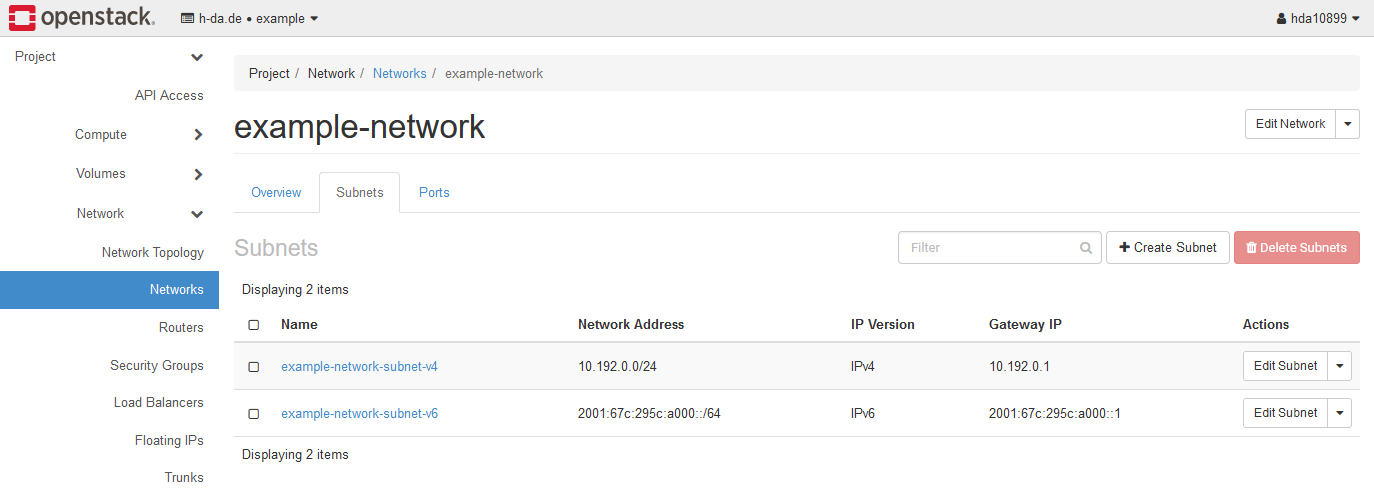
Initially the project network provides a private 10.x.x.x/24 IPv4 subnet as well as a /64 IPv6
subnet. All IPs from the IPv6 subnet will be publicly reachable, as long as allowed by the configured
security groups. For IPv4 however, you will need to assign a floating IP as described here.
Additional information regarding IPv6
In addition to the allocated /64 IPv6 network an IPv6 container of the size /60 is allocated
outside of OpenStack for your project. Therefore, you will be able to create up to 16 IPv6 /64
networks in your project.
Reasoning
One might ask why we provide a /60 container at all. This is due to the fact that splitting up
a /64 network into smaller networks would break various features of IPv6 like Autoconfig,
SLAAC and so on. To cite RFC 5375:
From RFC5375
Using a subnet prefix length other than a /64 will break many features of IPv6, amongst other things Neighbor Discovery (ND), Secure Neighborship Discovery (SEND) RFC3971, privacy extensions RFC4941, parts of Mobile IPv6 RFC4866, PIM-SM with Embedded-RP RFC3956, and SHIM6 SHIM6. A number of other features currently in development, or being proposed, also rely on /64 subnet prefixes.
Regarding the example project one could create the subnets 2001:67c:295c:a000::/64 (first subnet
created by default in the project network) through 2001:67c:295c:a00f::/64. Everything else will not
be routed outside your project. However, a new network needs to be attached to the project router in
order to receive traffic. More on that later in this document.
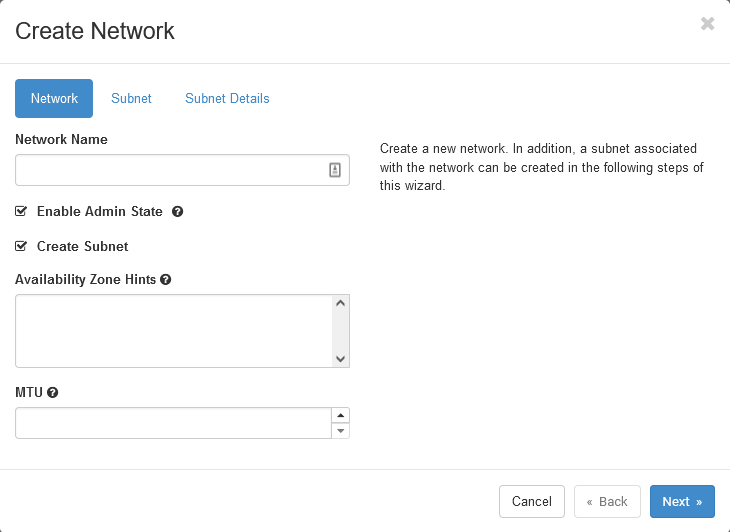
Creating new networks
To create a new network with new subnets click the +Create Network button in the overview page
or the topology page and enter the required information in the dialog.
In the network tab provide the name of your network and select whether you want to create a subnet or not. It is advised to not change the MTU here to ensure everything functions correctly.
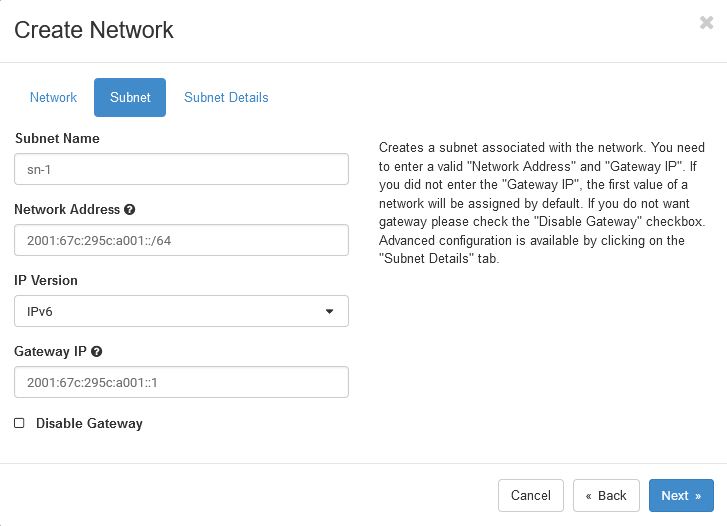
In the subnet tab you define the name and the address space itself you want to create. Here you
also decide whether an IPv4 or IPv6 subnet should be created. If required the gateway address
is also set here.
The Subnet Details page is only accessible when you have entered the required information on the Subnet page. Here you basically have two options
At first you will see the dialog down below. If you plan on assigning your IPs manually you can uncheck Enable DHCP, leave the page as is and just create the network.

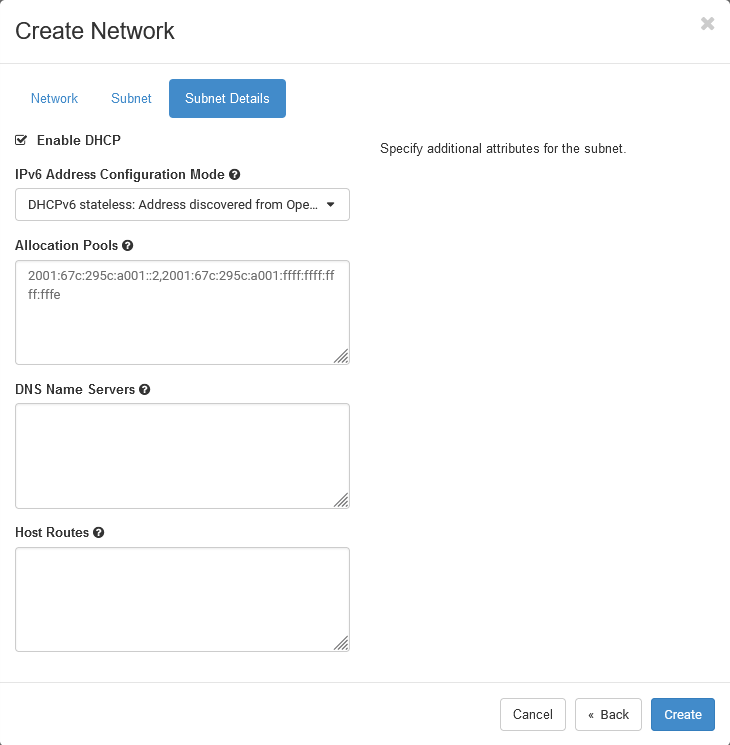
If you want your IP addresses to be assigned via DHCP fill in the information as shown below.
For IPv6 an additional dropdown is shown when Enable DHCP is checked. You want to select
the DHCPv6 stateless option here. To define the allocation pool enter the first and last
addresses in csv format.
Creating a subnet in an existing network
To create a new subnet in an already existing network, select your network from the network overview
page and go over to the Subnet Tab.
Here click the +Create Subnet button. You will be presented the same dialog talked about
above. Enter your subnet details and you're done.
Adding a router interface
Suppose we created a new network test with the subnet shown in the examples above and outgoing
traffic is required. To achieve this a new interface must be created for the project router that
was created alongside your project.
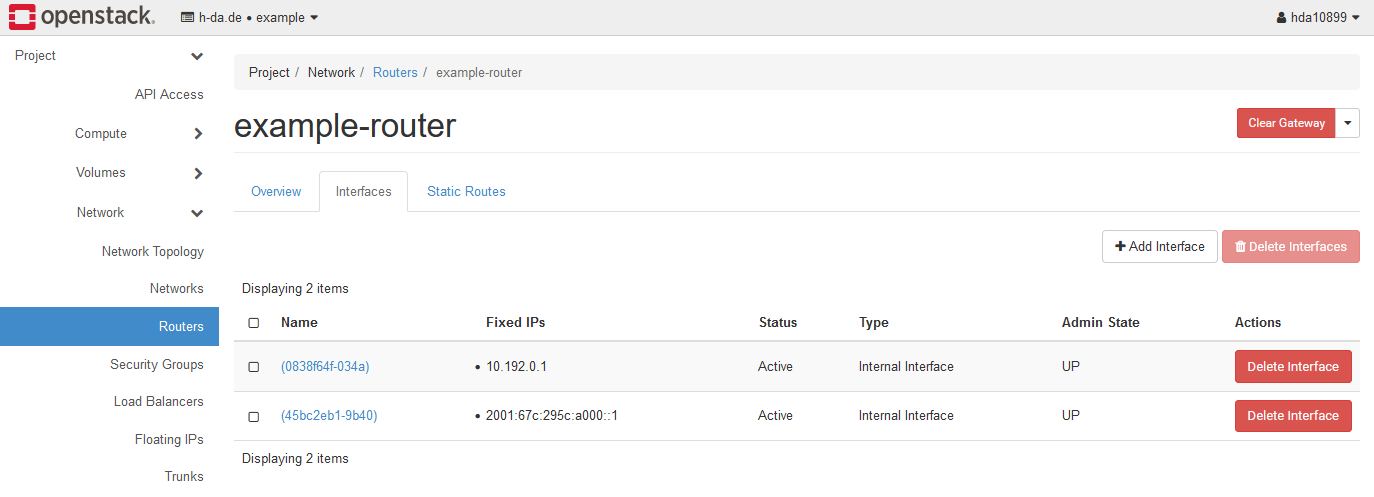
Navigate to the router overview page directly under the networks overview page on the left.
Here click on the project router's name to open the router details and select the Interfaces tab.
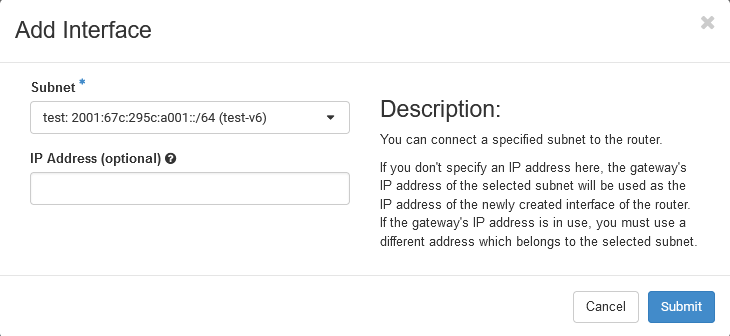
To attach the newly created network click the +Add Interface button.
In the dialog, select the network you want to create an interface for. In this case test.
If your network does NOT use DCHP you may provide an optional IP address here. For DHCP
networks the gateway IP entered when creating the network should automatically be given to the
interface.
The new interface will first be shown as Down but should be Active within seconds, simply refresh
the page, and it should now be shown as Active.
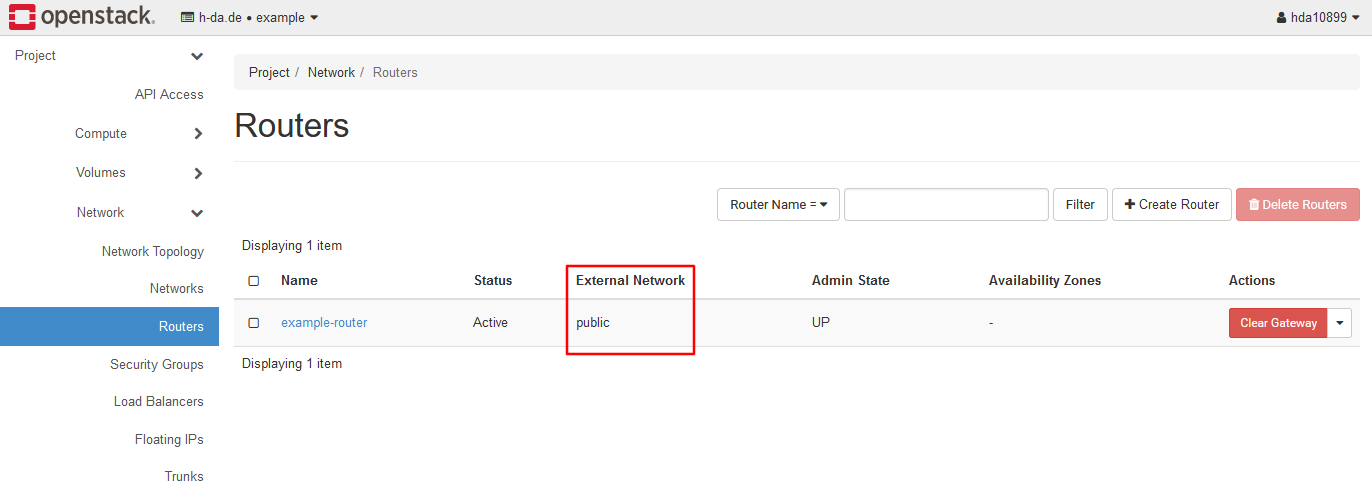
Additional information regarding public networks
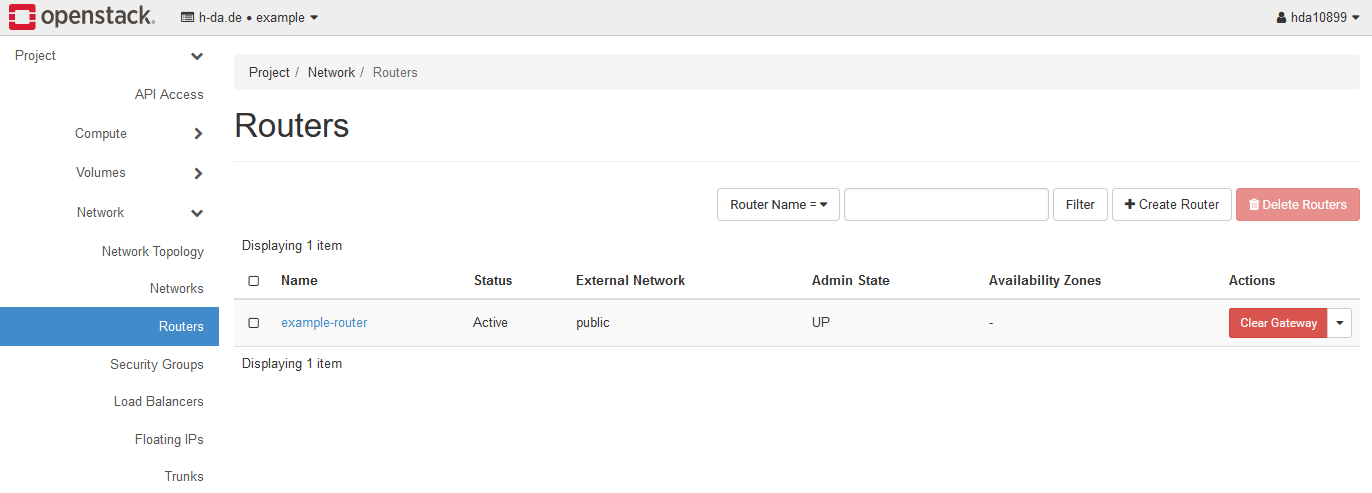
Every project created in OpenStack is assigned to an external / public network which will also be used for allocating Floating IPs as discussed earlier. For normal operation within the OpenStack dashboard, the specific public network is not of too much concern.
However, when it comes to the use of automation tools like Terraform you might need to specify a public
network, as the most common default value of public is not always applicable. To find the name of the
public network your project is assigned to, navigate to the Routers overview page found under the Network
category on the left. Here you will see your project's router with the name of the assigned public network.