Using PuTTY
Some users might prefer to use PuTTY to connect to their OpenStack instances. This document aims to guide users through the process of connecting to an instance using PuTTY and how to deal with PuTTY's own key format.
Connecting to an instance
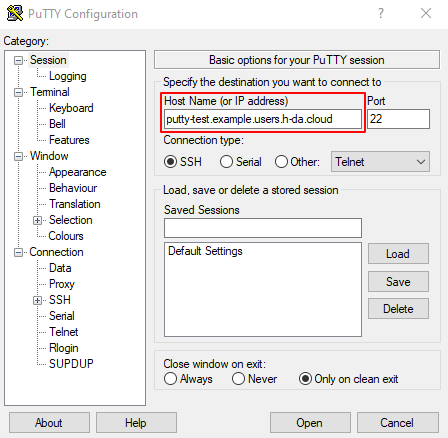
Assuming you already have your SSH keys set up as described below, use the following steps to connect to your instance. We assume you created a DNS record as described here for your instance. If you did not create a DNS record simply replace the hostname with the IP of your instance.
Open PuTTY and enter your instances hostname or IP address in the respective field on the top. Later you can also load previously saved sessions here.
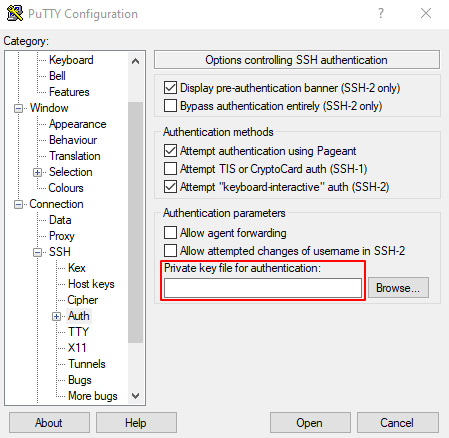
After entering the connection information navigate to the Auth configuration. You will find it in the
category tree on the left under SSH. Here select your private key in PuTTY's format (.ppk).
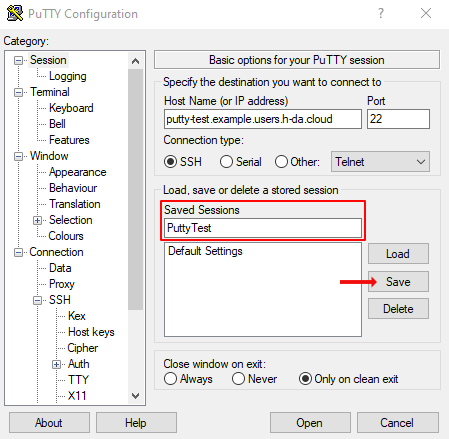
Lastly, we advise you to save this configuration to avoid having to re-select the key every time you want
to connect to your instance. Enter a name for the configuration and press Save.
Click on Open to connect and enter the username in accordance with the source image you chose when prompted.
An overview table of the username to use for each public image can be found here.
Key management
The following examples show two ways of using PuTTY to manage SSH keys to be used for OpenStack. Choose the one that fits your situation.
Using an OpenStack generated SSH Key in PuTTY
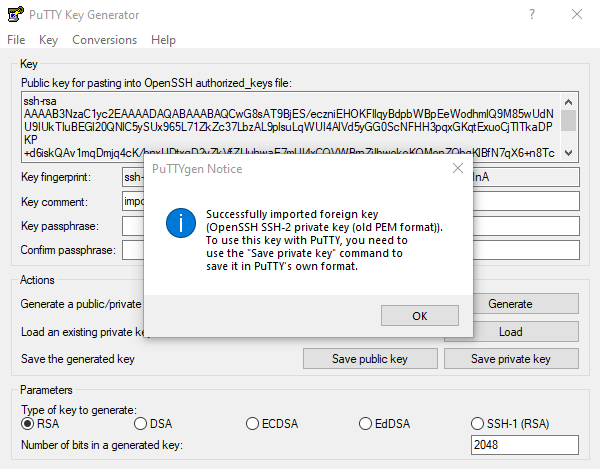
Import your private key that was generated with OpenStack by opening PuTTYGen and select Load private key from the file dropdown. Locate the file you saved the private key in and open it. PuTTYGen will
inform you that the key needs to be saved in PuTTY's own key format to be used later.
Select Save private key from the file dropdown to save the private key as PuTTY's own format. If you did not specify a passphrase for the key, PuTTY will ask you if you really want to save the key without a passphrase. Decide as you please.
Using a PuTTY generated key in OpenStack
To use a previously generated key within OpenStack you need to open your key file using PuTTYGen.
After opening PuTTYGen select Load private key from the file dropdown and enter your passphrase if
necessary.
When the key is loaded, you will see the associated public key being displayed in a field labeled "Public key for pasting into OpenSSH authorized_keys file".
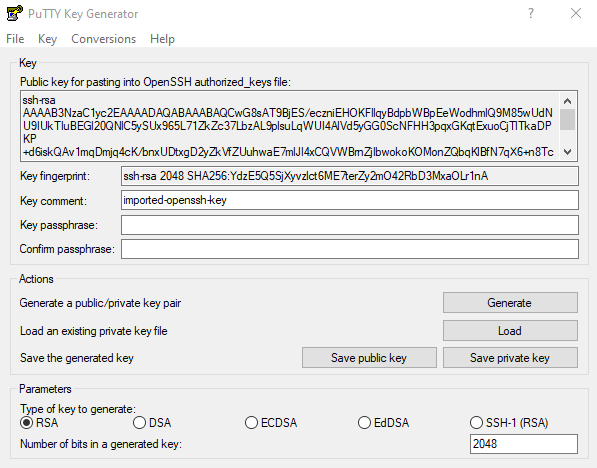
This is the key you want to copy and paste into the Public Key field when importing an existing SSH key in OpenStack. If you were to load a public key file that was generated by PuTTY creating the keypair in OpenStack will fail due to the key format not being supported.