Security Groups
Previous sections referred to so called Security Groups already. You will need security groups to control
access to your instances, i.e. if you want to access your instance via SSH or run a web server, as well as
many other use cases. This document will go over the different options for security groups, and will try to
guide you in creating meaningful security groups.
Understanding Security Groups
What are Security Groups?
The short answer to this question is that a security group acts like a firewall. Security groups contain a set of rules that control which traffic directed to (ingress) and originating from (egress) your instances is allowed to pass through.
By default, no traffic is permitted to and from your instances. Only by assigning security groups you will be able to access your instances. Therefore, a good understanding of how these rules work is required.
Example SSH access
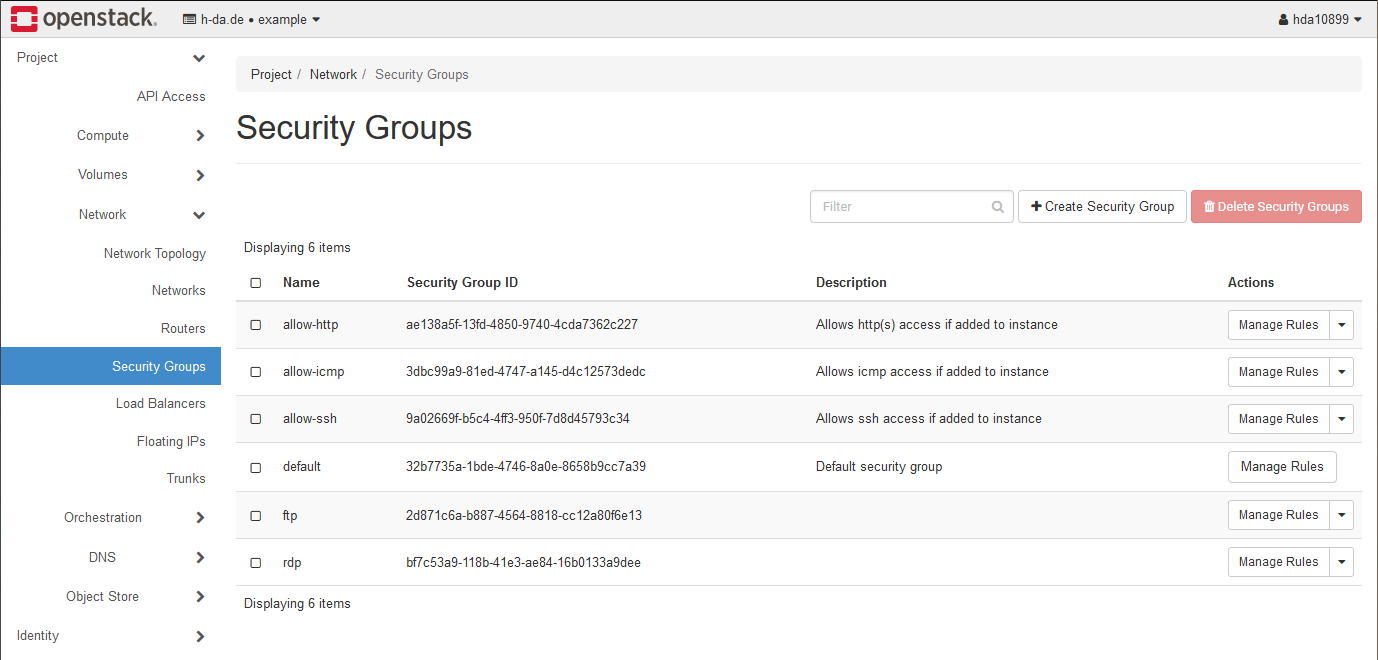
To better understand security groups, take a look at one of the pre-defined security groups. You
can find security groups under the Network category on the left.
By clicking on Manage Rules for the allow-ssh security group, you will see 4 rules displayed.
These rules exist in pairs for IPv4 and IPv6, as a single rule can only ever apply to a single IP address
family.
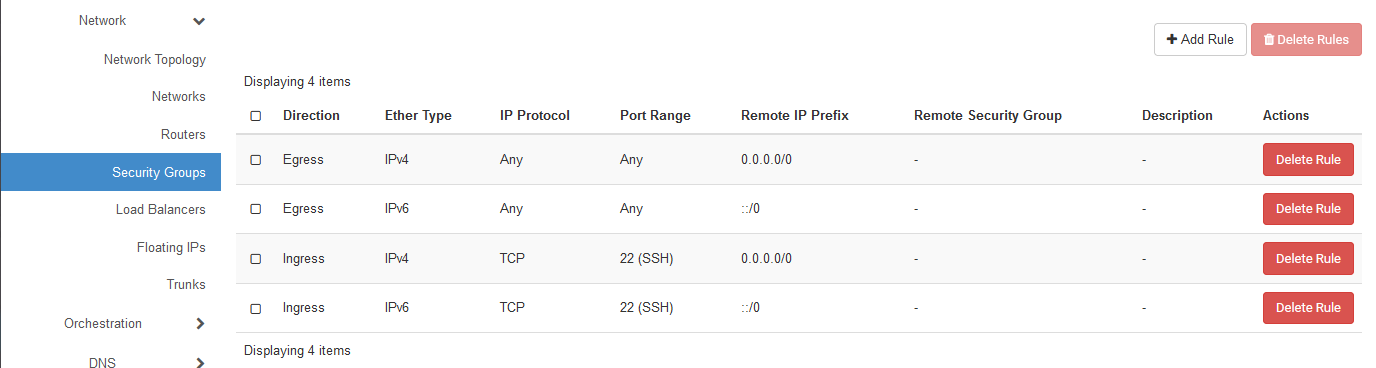
Ignore the Egress rules for outgoing traffic for now. What permits SSH access are the two Ingress rules
that allow traffic on port 22 (as shown by the Port Range column) for all incoming IP prefixes (as shown
by the Remote IP Prefix column).
Traffic Direction
After taking a look at some example security groups, let's go over the components that make up security groups. Let's begin with the direction of traffic, as it is very important to understand how traffic flows within and out of your project's network to create meaningful security groups.
Egress Rules
Every Security Group you create will have two egress rules by default, one of them for IPv4 and one for
IPv6. These egress rules will open up connections for all protocols and ports as noted by the Any
keywords in the Port Range and Protocol columns. You would NOT want to do this for ingress rules
(except in one specific use case we will cover later).


In short Egress rules apply to traffic moving from your instance to the Internet or more specific to traffic originating from your instance.
Ingress Rules
Contrary to egress rules, ingress rules apply to traffic directed to your instances from the internet. Regarding the default security rule, you might wonder, why the ingress rules also allow all protocols and ports. This might seem unsafe and it would be, if the rules did not have a Remote Security Group assigned.


In short Ingress rules apply to traffic moving from the outside to your instance or more specific to traffic directed to your instance.
Security Rule Options
With the traffic direction taken care of, let's go over the options that are available to you when creating security group rules. In the end we will provide some examples for you to use.
Protocol
- The most basic restriction step that can be taken is limiting the allowed protocol by choosing a specific
Rule Type from the Rule dropdown when creating a new security group rule. You will be using the options
Custom TCP RuleorCustom UDP Rulefor the most part.
Port / Port Range
- When choosing a
Custom TCP RuleorCustom UDP Ruleas the Rule preset, you will need to specify either a specific port or a port range for which traffic should be allowed. Choose these ports with caution, as opening up too many ports can lead to insecure instances. If you need to permit inter instance communication, you might want to take a look at Remote Security Groups.
CIDR (Classless Inter-Domain Routing)
- In short, selecting the
CIDRoption from the Remote dropdown will allow you to limit access to open ports to traffic originating from a specific subnet. Furthermore, based on the kind of IP you enter here the rule will only apply for the corresponding IP family. The CIDR notation is a way of specifying a set of consecutive IP addresses using a simplified notation by combining an IP address with a short form of its subnet mask. For more details visit the CIDR Wikipedia page.
CIDR Examples
Take the following examples to gain a general understanding of the CIDR notation. The important thing to
understand is that the last number (e.g. /24) designates the size of the block. The larger the number, the
smaller the block. (examples from NERC)
| CIDR | Description |
|---|---|
| 0.0.0.0/0 | All IPv4 addresses in the known universe. Note: This also applies regardless of the leading address - 198.51.100.0/0 is therefore equivalent to 0.0.0.0/0. |
| 198.51.0.0/16 | All 16,384 addresses from 198.51.0.0 through 198.51.255.255 |
| 198.51.100.0/24 | All 256 addresses from 198.51.100.0 through 198.51.100.255 |
| 198.51.100.64/27 | All 32 addresses from 198.51.100.64 through 198.51.100.95 |
| 198.51.100.200/32 | The single IPv4 address 198.51.100.200 |
| CIDR | Description |
|---|---|
| ::/0 | All IPv6 addresses in the known universe |
| 2001:db8::/32 | All addresses from 2001:db8:0:0:0:0:0:0 through 2001:db8:ffff:ffff:ffff:ffff:ffff:ffff |
| 2001:db8:aaaa::/56 | All addresses from 2001:db8:a:0:0:0:0:0 through 2001:db8:a:00ff:ffff:ffff:ffff:ffff |
| 2001:db8:aaaa::/64 | All addresses from 2001:db8:a:0:0:0:0:0 through 2001:db8:a:0:ffff:ffff:ffff:ffff |
| 2001:db8:aaaa:bbbb:cccc:dddd::/96 | All addresses from 2001:db8:a:b:c:d:0:0 through 2001:0db8:a:b:c:d:ffff:ffff |
| 2001:db8:a:b:c:d:e:100/128 | The single IPv6 address 2001:db8:a:b:c:d:e:100 |
The campus network consists of the following subnets for IPv4 and IPv6. Set the CIDR field to these values to limit access only to users connecting from these IP spaces:
| IP Family | CIDR |
|---|---|
| IPv4 | 141.100.0.0/16 |
| IPv6 | 2001:67c:2184::/48 |
Remote Security Group
Besides using a CIDR as the remote to limit access, OpenStack also provides the option to provide another security group. This is particularly useful when internal communication is required, i.e. when running different application layers like a web server, a database, etc. in different instances.
Using a security group as the remote will limit the rule to only permit the specified ports or protocols
to traffic originating from instances that have the specified security group assigned. Take the default
security group as an example.
Example: default security group
- The traffic flow of two instances with the
defaultsecurity group will look something like this. (assuming no other security groups are assigned) 

-
Assigning the default security group to two instances will allow them to communicate internally on any port or protocol, as well as allow them to access anything on the internet. Ingress traffic however is completely blocked, as the remote security group assignment only permits traffic from instances carrying the default security group.
Example: web servers and databases
- As the default security group is quite open in regards to inter instance communication take this example as a more realistic scenario of using remote security groups. Let's assume we have a couple of web server instances as well as some database instances.


-
The traffic to the instances should be restricted as follows:
- Web Servers should be reachable by anybody via port 443 (HTTPS)
- The databases should not be reachable from the outside
- Inter instance communication should only be allowed from the web servers to the database port (i.e. 3306 MySQL) and to no other port and from no other instance
-
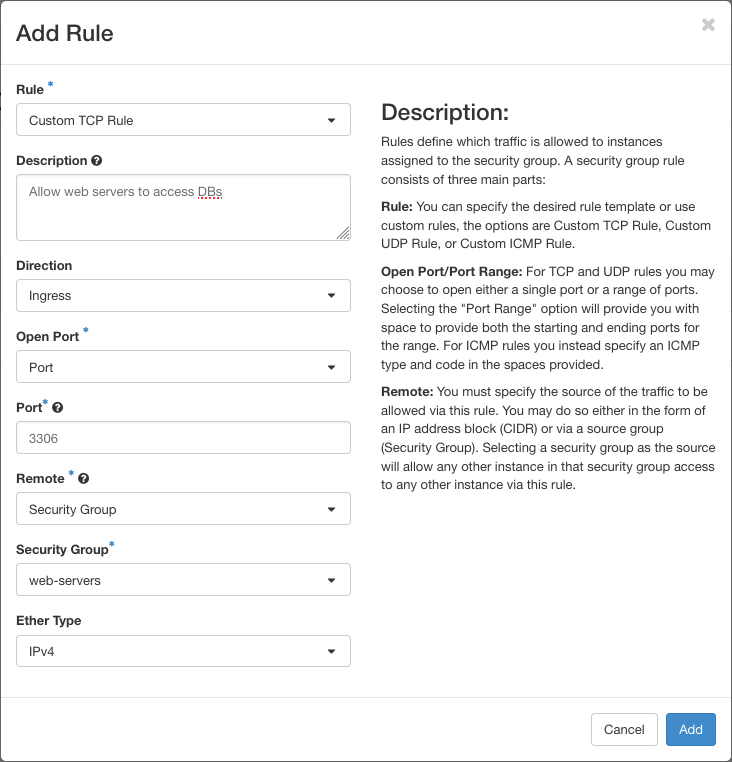
This can be done with remote security groups. If we create 2 security groups one called
web-serverswhich will have ingress rules allowing traffic on port 443 and a second one calleddatabaseswhich will allow traffic originating from instances with theweb-serverssecurity group and from nowhere else. The creation dialog of the latter rule would look as follows. -
Creating Security Groups
Note
Before creating a security group, ask yourself what you actually want to achieve. If you want to control
access between instances, security groups are not what you are looking for. So long instances are assigned
the default security group, inter instance communication is generally permitted. Some problems might
occur, if an instance itself runs a firewall like UFW on Ubuntu.
Since we cannot provide security groups for all use cases, use this guide to create your own security
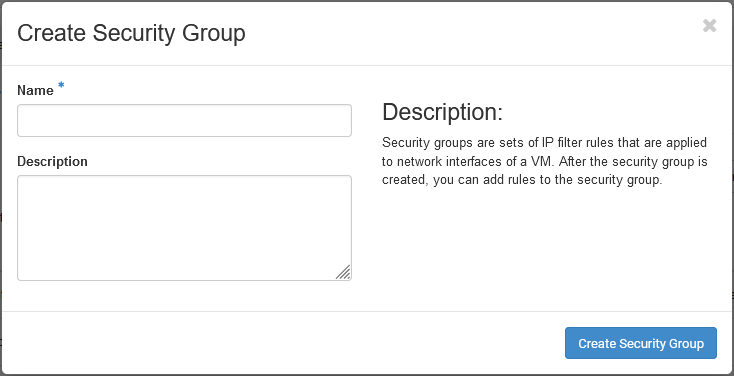
groups. Use the +Create Security Group button found in the security group overview to add a new security
group.
In this dialog provide a name for your security group and an optional description. Choose your security group names as descriptive as possible.
After creating your security group a page appears that contains two rules already.
These two Egress rules allow your instance to communicate with the outside world. You may delete
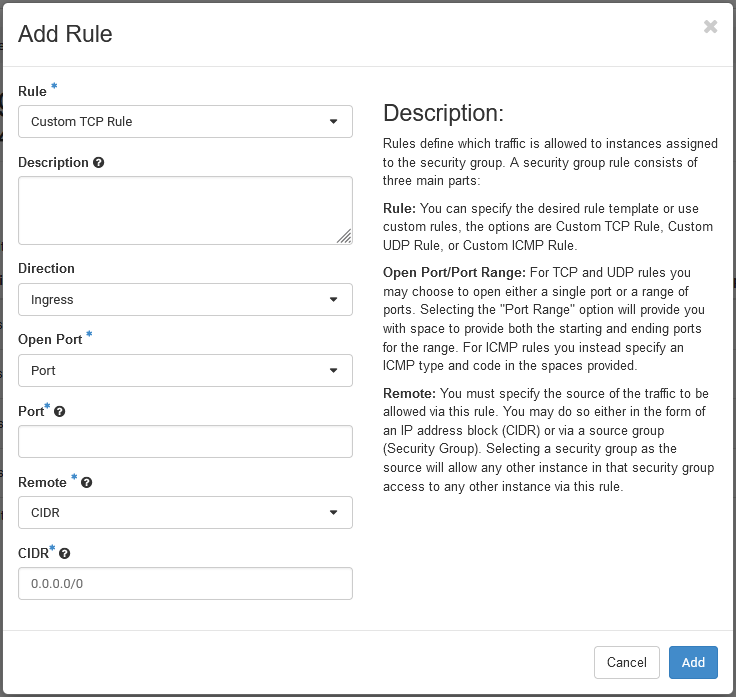
these rules if they are too "open" for your needs. To create new rules click the +Add Rule button.
The following dialog appears, where you also find information about their fields.
Tip
Keep your security groups as simple as possible. That is, do not add too many different rules, because it can quickly become quite confusing. There is nothing technically wrong with keeping all rules for ICMP, SSH, etc. in one group, but this makes it quite difficult to debug problems.
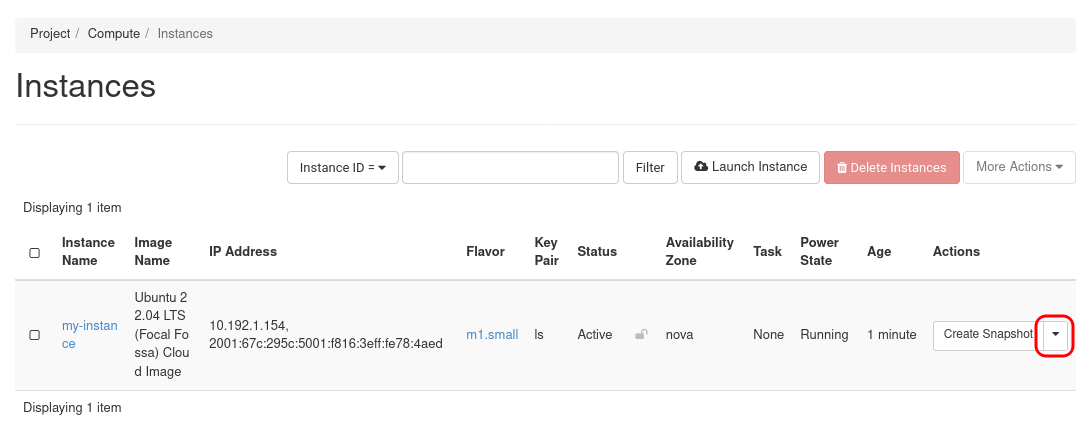
Adding Security groups to instances
Modify security groups associated with an instance by going to the instance overview page and
choose Edit Security Groups in the dropdown menu.